In this article, we will walk you through the process of how to install LED strip lights in a ceiling, covering everything from planning and preparation to the final installation and testing.
LED strip lights are a popular and versatile lighting option for homes and businesses alike. They offer flexibility, energy efficiency, and can add a modern touch to any space.
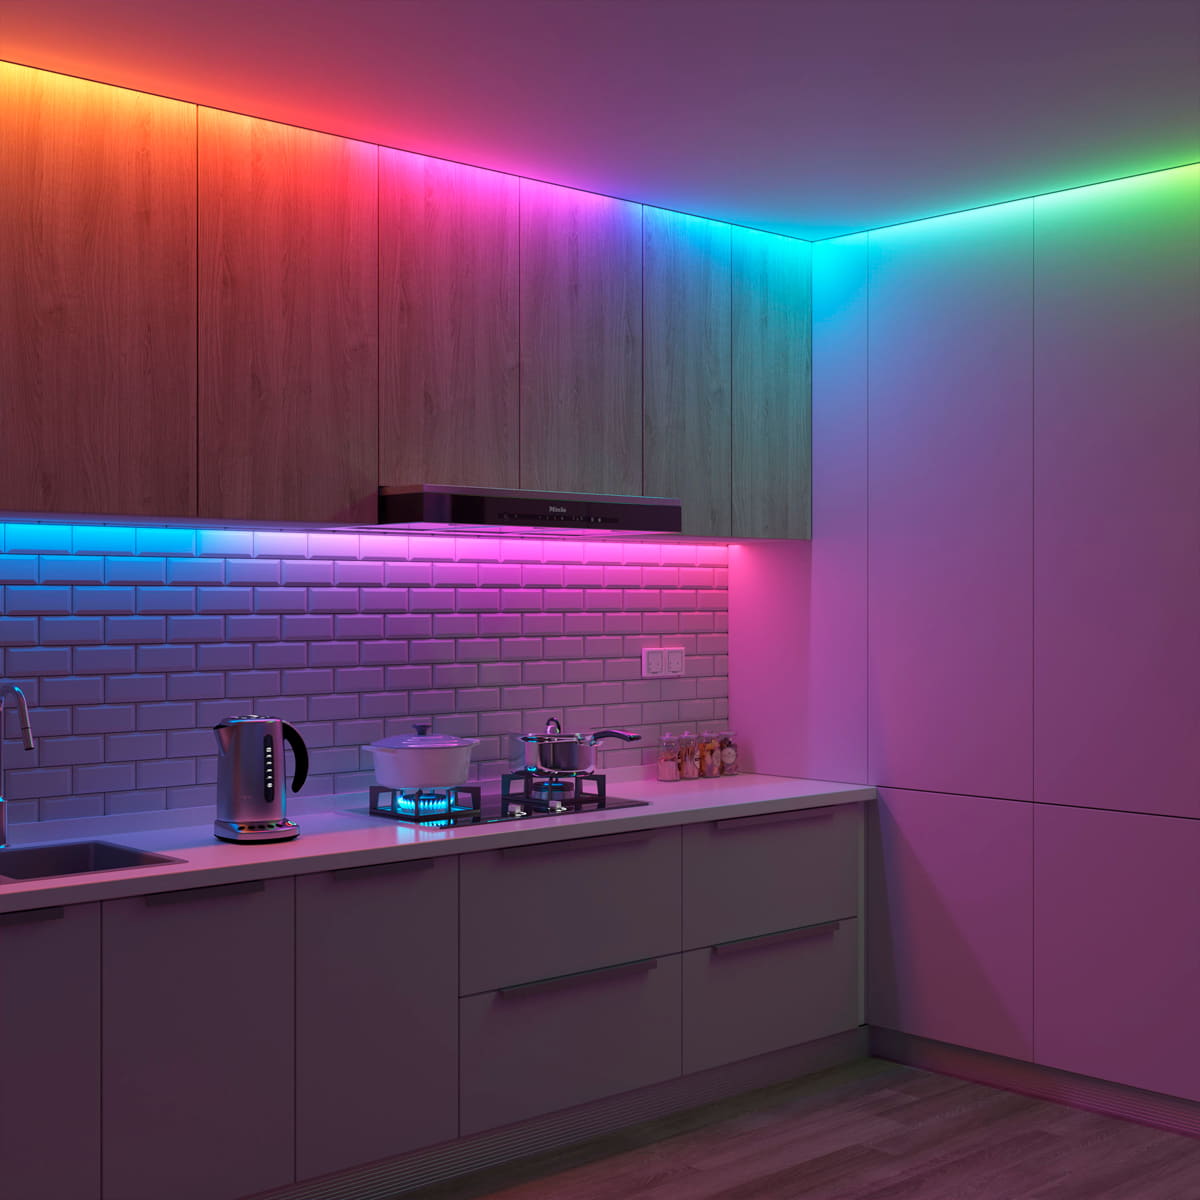
Installing LED strip lights in the ceiling can create a unique ambiance and enhance the overall aesthetic of a room.
How To Install Led Strip Lights In Ceiling
Planning and Preparation
Before diving into the installation process, it’s essential to plan and prepare adequately. Here are the key steps to follow:
- Choose the Right LED Strip Lights: Select LED strip lights that are suitable for ceiling installation. Consider factors such as brightness, color temperature, and waterproofing if the lights will be exposed to moisture.
- Measure the Ceiling: Measure the length of the area where you want to install the LED strip lights. This will help you determine how much lighting you’ll need and where to place the strips for optimal coverage.
- Gather Materials: Gather all the necessary materials and tools, including the LED strip lights, power supply, connectors, mounting clips, a ladder, and a screwdriver.
How To Install Led Strip Lights In Ceiling
Now let’s dive into the actual installation process:
Turn Off Power
Before starting any electrical work, turn off the power to the area where you’ll be installing the LED strip lights. This ensures safety and prevents accidents.
Prepare the Ceiling
Clean the ceiling surface where you plan to mount the LED strip lights. Ensure it’s free of dust, dirt, and debris to ensure a secure attachment.
Mount the LED Strip Lights
Using mounting clips or adhesive backing, attach the LED strip lights along the desired area of the ceiling. Make sure the strips are straight and evenly spaced for a professional look.
Connect the Strips
If your LED strip lights require multiple sections, use connectors to join them together. Follow the manufacturer’s instructions for proper connection.
Install the Power Supply
Mount the power supply in a convenient location near the LED strip lights. Connect the power supply to the strips following the wiring diagram provided with the lights.
Test the Lights
Once everything is connected, turn on the power and test the LED strip lights to ensure they are functioning correctly. Make any necessary adjustments or troubleshooting if needed.
How To Install Led Strip Lights In Ceiling – Additional Tips and Considerations
- Dimmer Compatibility: If desired, install a dimmer switch to control the brightness of the LED strip lights.
- Color Options: Explore different color options and lighting effects to customize the ambiance of the room.
- Safety Precautions: Always follow safety guidelines and codes when working with electrical installations.
- Maintenance: Regularly clean and inspect the LED strip lights to ensure they continue to operate efficiently.
How To Install Led Strip Lights In Ceiling : Wrapping It UP
Installing LED strip lights in the ceiling can transform the look and feel of a space while providing energy-efficient lighting solutions.
By following the steps outlined in this guide and paying attention to details, you can successfully install LED strip lights in your ceiling and enjoy the benefits of modern and stylish illumination.
Whether it’s for accent lighting, task lighting, or ambient lighting, LED strip lights offer versatility and creativity for various applications. Get started today and brighten up your space with LED strip lights!


2 Comments