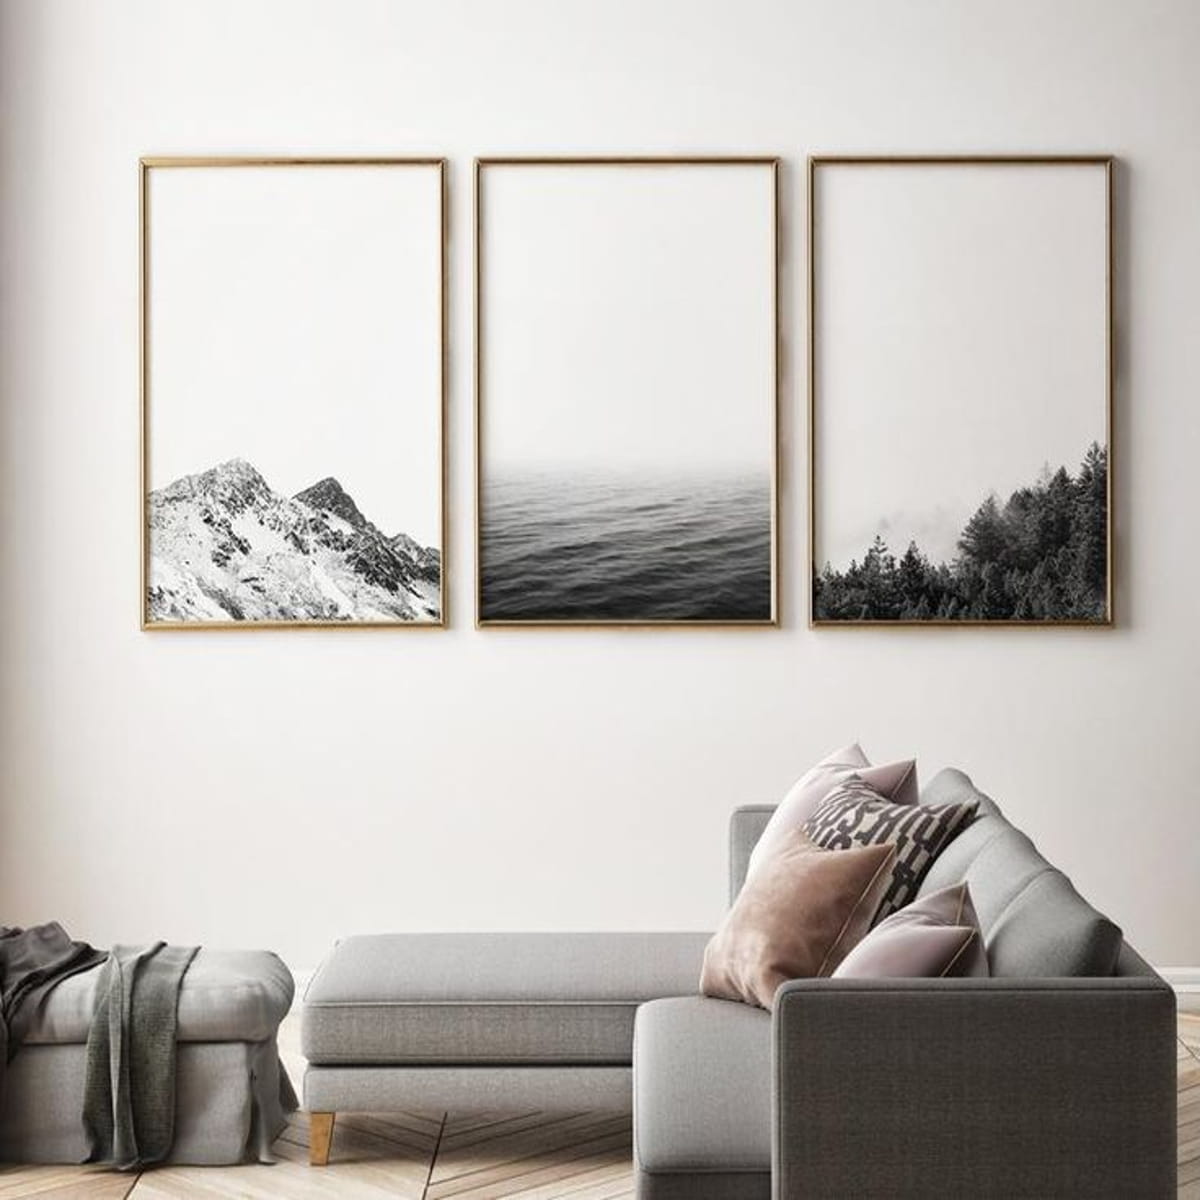
Decorating your living space with framed pictures and artwork can transform a dull room into a vibrant, personalized haven. However, how to mount pictures on wall may seem daunting, especially if you’re not familiar with the best techniques and tools to use.
Fear not! In this comprehensive guide, we will delve into the art and science of how to mount pictures on wall, sharing expert tips and tricks to ensure your cherished memories and artworks are displayed flawlessly. Let’s embark on this journey together to elevate your home decor game.
Choosing the Right Wall for Your Pictures
Not all walls are created equal, and selecting the appropriate wall for your pictures is crucial to achieving a cohesive and visually appealing arrangement. Consider the following factors:
- Wall Color and Texture: The color and texture of your wall play a significant role in how your pictures will be perceived. Lighter walls tend to complement a wider range of artworks, while textured walls may require special attention when choosing hanging hardware.
- Room Lighting: Assess the natural and artificial lighting in the room. Be mindful of glare and reflections on glass frames, and position your pictures accordingly to minimize these distractions.
- Furniture Placement: Take into account the placement of furniture in the room. Pictures should harmonize with the overall layout, complementing rather than competing with other design elements.
- Eye Level Rule: A general rule of thumb is to hang pictures at eye level, which is around 57 to 60 inches from the floor. This ensures that your artwork is easily visible and creates a balanced visual impact.
By carefully considering these factors, you’ll be able to make informed decisions about where to place your pictures for maximum aesthetic appeal.
Examine the surface of the wall
Drywall. You’re in luck if the wall you’re working with is composed of drywall; this is the easiest material to work with because it’s simple to penetrate. Just be careful to find a wall stud—hanging directly on plasterboard will not give you a stable anchor. It is vital to utilise a drywall anchor to hang pictures if there isn’t a sturdy stud accessible.
Brick. You will require a wall anchor if your walls are made of brick. And drill into the mortar rather than the brick itself by using a masonry bit on your drill.
How to Mount Pictures on Wall Like a Pro
Using a Wire to Mount Pictures on Wall
Using a wire to hang pictures provides flexibility in adjusting the height and positioning of the frame. Follow these steps for a professional and versatile hanging solution:
Gather your tools:
- Picture frame
- Picture wire
- Pencil
- Tape measure
- Level
- Hammer
- Nails
Attach the wire:
- Securely attach the picture wire to the D-rings or eyelets on the back of the frame. Ensure that the wire is taut.
Measure and mark:
- Measure and mark the desired height for your picture on the wall, using a level for accuracy.
Find the right spot:
- Hold the frame against the wall and align it with the mark. Mark the spots where the nails will go.
Hammer the nails:
- Hammer nails into the marked spots, making sure they are level and secure.
Hang the picture:
- Hang the picture on the nails, adjusting the height as needed.
How to mount pictures on wall without Nails using Strips
For those who prefer a damage-free and easily adjustable solution, picture hanging strips are an excellent option. Follow these steps for a hassle-free and removable picture hanging experience:
Gather your tools:
- Picture frame
- Picture hanging strips (rated for the weight of your frame)
- Clean cloth
- Rubbing alcohol
Prepare the wall and frame:
- Clean the wall surface with rubbing alcohol and let it dry.
- Remove any dust or debris from the back of the frame.
Apply the strips:
- Attach the picture hanging strips to the back of the frame, following the package instructions.
- Press firmly to ensure a strong bond.
Position the frame:
- Hold the frame against the wall, aligning it with your desired placement.
Press and hold:
- Press the frame against the wall firmly for the recommended time to allow the strips to adhere securely.
Using Sawtooth Picture Hangers to Mount Pictures on Wall
Sawtooth hangers are a popular choice for mounting lightweight to medium-weight frames. Follow these steps for a secure and straightforward installation:
Gather your tools:
- Picture frame with sawtooth hanger
- Pencil
- Tape measure
- Level
- Hammer
- Nails
Measure and mark:
- Measure and mark the desired height for your picture on the wall, using a level for accuracy.
Find the right spot:
- Hold the frame against the wall and align it with the mark. Mark the spot where the sawtooth hanger will go.
Hammer the nail:
- Hammer a nail into the marked spot, ensuring it is level and secure.
Anchor the sawtooth hanger on the picture frame:
Place the sawtooth hanger on top of the mark you made precisely in the middle of the frame.Centre the sawtooth hanger and mark the nail holes with a pencil.
Use two tiny nails to firmly anchor the sawtooth hanger in place. Place a nail in the hanger’s hole and hammer it firmly into position.
In order to prevent the nail from entering at an angle, hammer as straight as you can. On the other side, repeat these steps. Take care not to snag your fingers with the hammer as the nail will be quite short to avoid going through the front of the frame.
Certain sawtooth kits contain screws, while others come with nails. Make sure the hanger is securely fastened by using the item that came with your package.
You’ll need to use a screwdriver instead of a hammer if it came with screws.
The sawtooth hanger must be fastened to the frame.
Even if the back of the image is covered in durable canvas paper, the hanger will most likely rip through it when you hang it on the wall.
Hang the picture:
Place the sawtooth hanger over the nail, ensuring it catches securely.
Verify that the image is level before hanging it.The sawtooth hanger should be positioned carefully so that it snags on the nail.
Then, drop it into place. Examine it from a distance to determine if it appears level. Because there are numerous “teeth” in the sawtooth hanger, you may need to reposition the photo slightly to ensure it hangs straight.
Use a level to see if the image is straight if you’re having problems determining it. Nowadays, “level” apps are available on a lot of smartphones, so you might not even need an extra tool.
If the frame scratches the wall, place rubber bumpers behind it. This is not required for every frame and is optional.
Occasionally, depending on the frame’s weight, the bottom edges may scrape the wall, leaving tiny blemishes or maybe chipping the paint. If so, you can place a single tiny rubber bumper under each of the frame’s lower corners.
In this manner, when it hits the wall, it won’t leave any markings.
Tips for Picture Hanging Success
- Use the Right Hardware: Choose the appropriate hanging hardware based on the weight and type of frame you are working with.
- Consider Eye Level: Hang pictures at eye level for optimal viewing. The center of the artwork should be at approximately 57 to 60 inches from the floor.
- Grouping and Arrangement: Experiment with different arrangements before committing to a final placement. Grouping pictures can create a visually appealing gallery wall.
- Test for Stability: Give the frame a gentle shake to ensure it is securely hung. Adjust if necessary.
- Use Anchors for Heavy Frames: For heavier frames or when hanging pictures on drywall, consider using anchors to provide additional support.
Arranging and Grouping Pictures
This section will guide you through the process of creating visually pleasing displays:
- Creating a Gallery Wall: Gallery walls are a popular trend that allows you to showcase multiple pictures in an artistic arrangement. Begin by laying your pictures on the floor and experimenting with different layouts until you find one that resonates with you.
- Balancing Sizes and Shapes: Mix and match various picture sizes and shapes for a dynamic display. Consider the overall balance, ensuring that larger or more prominent pieces anchor the arrangement, while smaller ones fill in the gaps.
- Maintaining Consistent Spacing: Consistent spacing between pictures is essential for a polished look. Use your tape measure to maintain equal distances between frames, creating a cohesive and organized display.
- Using Templates for Precision: To achieve precise arrangements, consider creating paper templates of your pictures and taping them to the wall. This allows you to experiment with different layouts without putting unnecessary holes in the wall.
By approaching the arrangement process with creativity and attention to detail, you can turn your wall into a captivating showcase of memories and art.
Maintenance and Rearranging
Your pictures are now beautifully displayed on the wall, but the journey doesn’t end there. Regular maintenance and the flexibility to rearrange your artwork can breathe new life into your living space. Consider the following tips:
- Cleaning and Dusting: Over time, dust and dirt can accumulate on your pictures. Use a soft, lint-free cloth to gently wipe the frames and glass. This not only enhances the visual appeal but also prolongs the life of your artwork.
- Updating the Display: Feel free to change the arrangement of your pictures periodically. This could involve swapping out certain frames, adding new artwork, or reconfiguring the layout. A fresh arrangement keeps your living space dynamic and interesting.
- Filling Empty Spaces: As you acquire new pictures or artwork, look for opportunities to fill empty spaces on your wall. This ongoing process allows your wall to evolve along with your personal taste and style.
Hanging pictures is an art that combines precision and creativity. By following the techniques outlined in this comprehensive guide, you can confidently mount your pictures with various methods, from the classic nail to the modern damage-free strips.
Enhance the aesthetic appeal of your living spaces and showcase your cherished memories with a beautifully arranged display that reflects your personal style. Remember, with the right tools and careful consideration, picture hanging can be an enjoyable and rewarding DIY project.
FAQ
How to Hang Pictures on Plaster Walls?
Hanging pictures on plaster walls can be achieved using various methods. Picture hangers designed for plaster walls, plaster wall anchors, toggle bolts, and adhesive hooks like Command Strips are suitable options.
For lighter items, Velcro strips or pegboards provide flexibility, while brass hooks or D-rings with picture wire offer a more traditional approach. For heavier pictures, consider using screws directly into the plaster or consulting professionals for proper installation.
Always be mindful of weight limits, and when drilling into plaster, take precautions to avoid damaging the material.
ALSO READ:
Decorations for Above the Bed:Elevate Your Space
How to Arrange Sofa and Loveseat in a Small Living Room Easily
How to Maintain Marine Aquarium: Mastering the Art


2 Comments