How to remove a Delta shower handle may seem like a daunting task, but with the right tools and knowledge, it can be done effectively and efficiently.
In this comprehensive guide, we will walk you through the step-by-step process of removing a shower handle from Delta, a leading brand known for its quality plumbing fixtures.
Whether you’re replacing a faulty handle or simply upgrading your bathroom, understanding how to remove a Delta shower handle is essential.
Let’s dive into the details!
How To Remove Shower Handle Delta
How To Remove Shower Handle Delta : Know Your Delta Shower Handle
Before we delve into the removal process, it’s crucial to familiarize yourself with the anatomy of your Delta shower handle.
Delta handles typically consist of a handle, a trim plate, a cartridge, and various screws and fasteners.
Knowing how these components work together will make the removal process smoother.
How To Remove Shower Handle Delta : Tools and Materials Needed
To successfully remove your Delta shower handle, you’ll need the following tools and materials:
- Screwdriver (Phillips or flat-head, depending on your handle’s screws)
- Adjustable wrench
- Allen wrench (if applicable)
- Replacement parts (if necessary)
- Penetrating oil (optional, for stubborn screws)
- Towel or rag
How To Remove Shower Handle Delta
- Turn Off Water Supply
Before starting any work, shut off the water supply to your shower.
This can usually be done by turning off the water valves located near the shower or at the main water supply for your house.
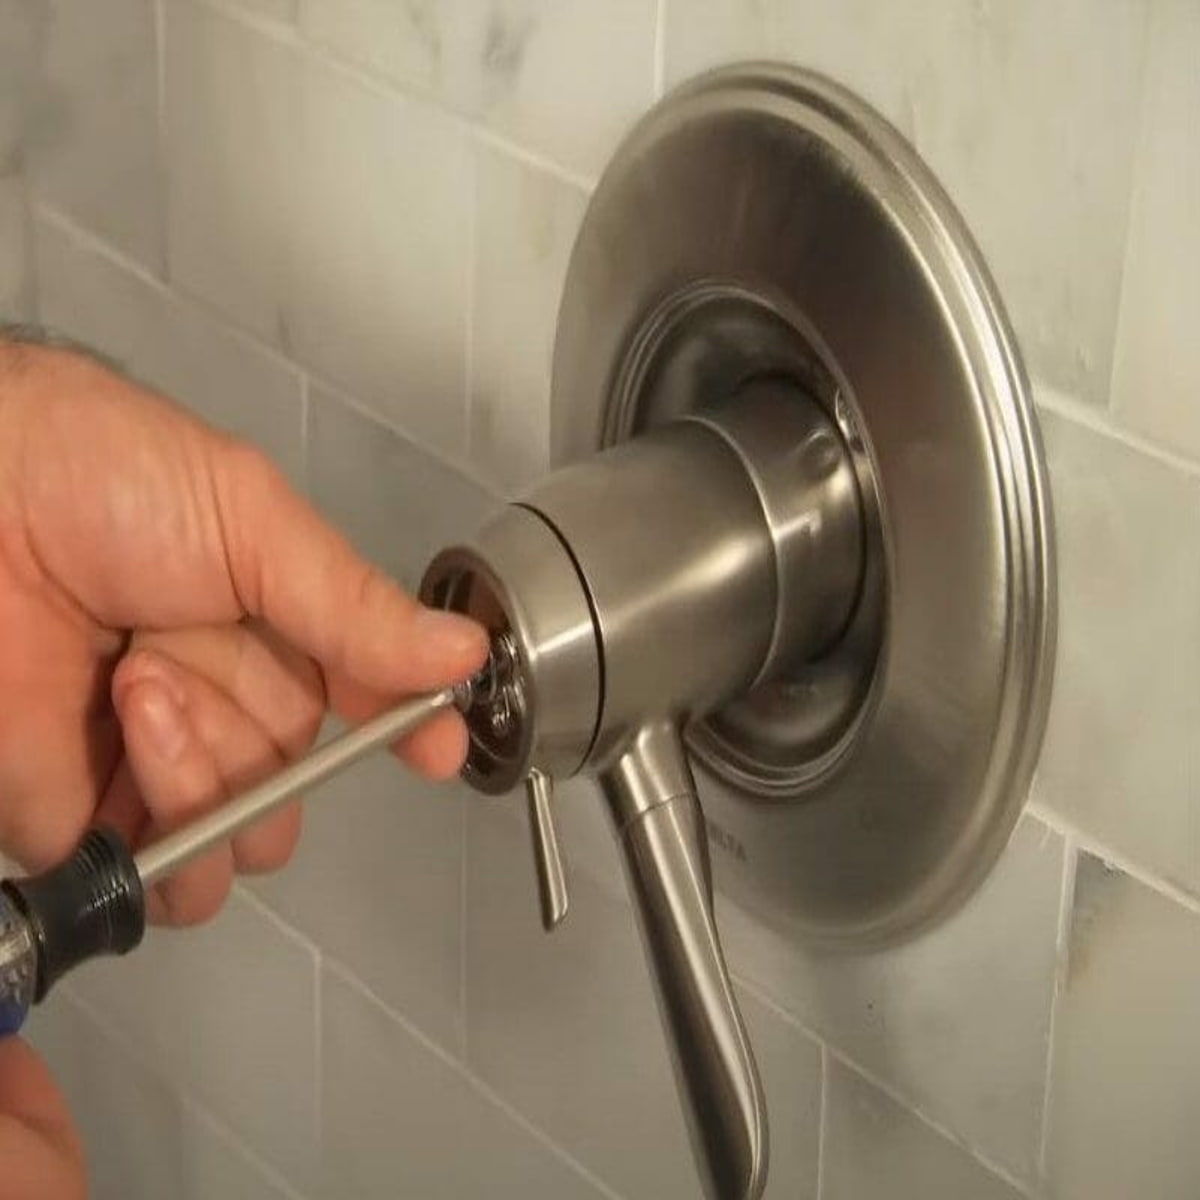
- Remove the Handle’s Cap or Cover
Use a flat-head screwdriver to carefully pry off the cap or cover of your Delta shower handle.
This will expose the screws or fasteners holding the handle in place.
- Unscrew the Handle
Depending on your Delta shower handle model, you may encounter Phillips or Allen screws.
Use the appropriate screwdriver or Allen wrench to loosen and remove these screws.
Keep the screws and any accompanying parts in a safe place.
- Extract the Cartridge
Once the handle is removed, you’ll have access to the cartridge inside.
Use an adjustable wrench to grip the cartridge and gently twist it counterclockwise to loosen it from the valve body.
Be cautious not to damage the cartridge or the valve housing.
- Clean and Inspect
With the cartridge removed, take this opportunity to clean any buildup or debris from the valve body.
Inspect the cartridge for any signs of wear or damage.
If necessary, replace the cartridge with a new one.
- Reassemble and Test
After cleaning and inspecting, reassemble the Delta shower handle in reverse order.
Tighten the screws securely but avoid over-tightening, as this can cause damage.
Turn the water supply back on and test the handle to ensure it functions properly.
How To Remove Shower Handle Delta : Parting Words
Removing a Delta shower handle is a manageable task that can be accomplished with the right tools and guidance.
By following this step-by-step guide, you can safely remove your shower handle and address any maintenance or replacement needs.
Remember to exercise caution, especially when working with water and plumbing fixtures.
With practice, you’ll become more confident in handling such tasks and maintaining your bathroom effectively.


One Comment